We at Volupe are excited to be back with new blog posts after the summer break where we did re-postings of our most appreciated blogs.
The first blog post for this season will bring up the topic Surface repair. Surface repair is a very useful tool if you have problems with your geometry. You can essentially solve all possible problems with Surface repair, and to know where the problems are located you can run a diagnostic and get color coded description of the problems.
But do remember that Surface repair is not part of the pipelined workflow. Meaning, if updates to your geometry needs to be made within the step prior in the workflow (in 3D-CAD for example), all changes made in Surface repair needs to be performed again. With that said, Surface repair will be a good tool when having a geometry that is difficult to repair in 3D-CAD.
GUI of Surface repair
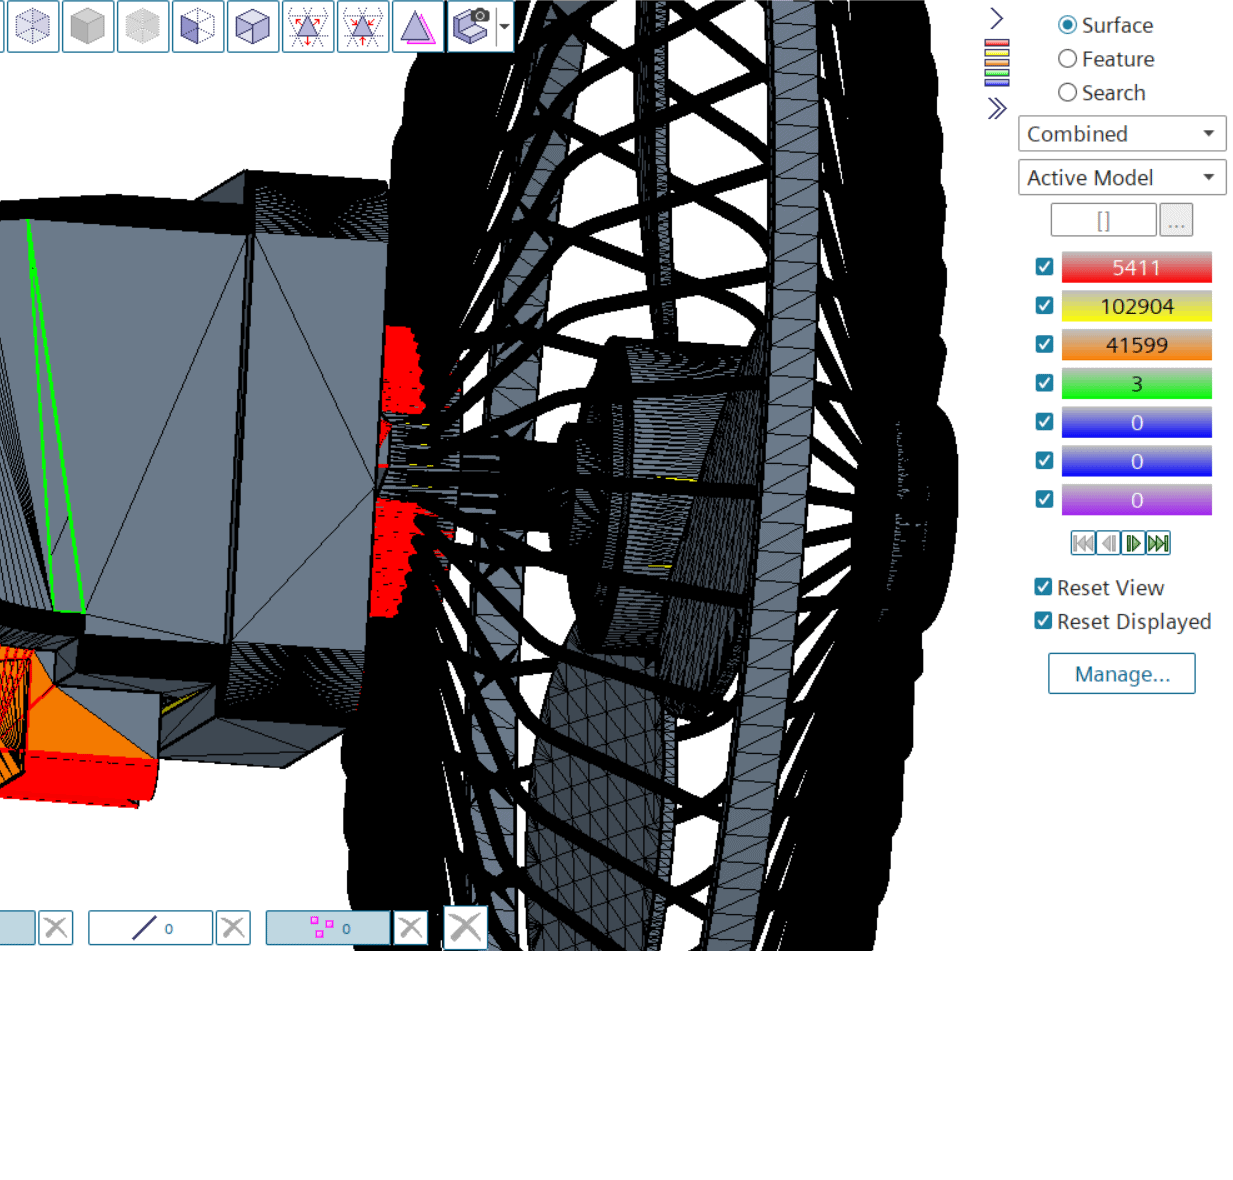
You enter Surface repair by right-clicking on your part and selecting Repair surface. You will then be welcomed by the interface in the picture below. The four blue circles in the picture indicate the most important groups of features in the GUI.
- Left-most: Tools to manipulate your geometry.
- Top middle: Features to visualize your geometry.
- Right-most: Diagnostic tool for executing a search for problematic surfaces and obtain color coding of problems.
- Bottom middle: Selection filter to toggle between selecting faces, edges and/or vertices.

In the picture you see that our geometry has some problems, where the most problematic colors are green (indicates that the surface is not closed) and red (which indicates pierced faces). From version 2306 and onward Surface repair even helps you with areas that might cause issues later in the simulation, for example when creating the volume mesh, reporting surfaces that almost pierce each other and therefore causes close proximities (shown by red color, together with faces that are actually pierced). Previously you could get an unwanted surprise in the meshing step from these kinds of surfaces, but now Simcenter STAR-CCM+ gives you this information already in this early stage of the simulation.
Useful features to close free edges
By Executing the diagnostic tool to the right in the GUI, see the picture above again, you get a visualization of the areas you need to work with. To the left in the GUI you can then use the tools available. There are three tools that are extra useful, especially when you should close holes that are open in the geometry: Zip edges, Fill holes and Collapse vertices.
Zip edges: is a useful tool when you have a hole in your geometry looking like a rip/tear, and this feature is the most useful when having a curved surface needing to be healed.
Fill hole: is a very useful tool when there is a hole in the geometry defined by edges in the same plane.
Collapse vertices: is a very useful tool when the hole in your geometry is going over a sharp corner in the geometry.
Managing views
In the main GUI of Simcenter STAR-CCM+ you have several options of how to manage your views, storing them, restoring a preview saved view etc. In the version 2306 this feature is implemented for Surface repair as well, making it easier for you to use the tool. Watch the video below for how to manage your views in the Snapshot tool.
Thank you for reading the first blog post after the summer break. We at Volupe hope that you have enjoyed getting to know Surface repair and that it will be a useful tool for you. Remember that you are always welcome to reach out at support@volupe.com with any questions.
Previously in the Volupe blog we have posted two blogs that touch upon Surface repair, please take a look at these blogs as well for more detailed information about the tool.
- How to find surfaces in Surface repair that can impact the volume mesh in a negative way, looking at angles, quality etc. https://volupe.se/finding-zones-that-potentially-give-poor-volume-mesh/
- How to create part curves where needed in Simcenter STAR-CCM+ Surface Repair tools. https://volupe.se/take-control-of-part-curves-in-simcenter-star-ccm/
Author

Christoffer Johansson, M.Sc.
support@volupe.com
+46764479945